Using the n8n-node tool#
The n8n-node tool is the official CLI for developing community nodes for n8n. You can use it to scaffold out new nodes, build your projects, and run your node as you develop it.
Using n8n-node, you can create nodes that adhere to the guidelines for verified community nodes.
Get n8n-node#
Run n8n-node without installing#
You can create an n8n-node project directly without installing by using the @n8n/create-node initializer with your package manager:
1 | |
This sets up the initial project files locally (an alternative to installing n8n-node locally and explicitly running the new command). Afterward, you run the rest of the n8n-node commands through your package manager's script runner inside the project directory (for example, npm run dev).
Install n8n-node globally#
You can install n8n-node globally with npm:
1 | |
Verify access to the command by typing:
1 | |
Command overview#
The n8n-node tool provides the following commands:
new#
The new command creates the file system structure and metadata for a new node. This command initializes the same structure as outlined in run n8n-node without installing.
When called, it interactively prompts for details about your project to customize your starting code. You'll provide the project name, choose a node type, and select the starting template that best matches your needs. The n8n-node tool will create your project file structure and optionally install your initial project dependencies.
Learn more about how to use the new command in the creating a new node section.
build#
The build command compiles your node and copies all the required assets.
Learn more about how to use the build command in the building your node section.
dev#
The dev command runs n8n with your node. It monitors your project directory and automatically rebuilds the live preview when it detects changes.
Learn more about how to use the dev command in the testing your node in n8n section.
lint#
The lint command checks the code for the node in the current directory. You can optionally use with the --fix option to attempt to automatically fix any issues it identifies.
Learn more about how to use the lint command in the lint your node section.
release#
The release command publishes your community node package to npm. It uses release-it to clean, check and cleanly build your package before publishing it to npm.
Learn more about how to use the release command in the release your node section.
Creating a new node#
To create a new node with n8n-node, call n8n-node new. You can call this command entirely interactively or provide details on the command line.
Create new node without installing
You can optionally create an n8n-node project directly without installing n8n-node by using the @n8n/create-node initializer with your package manager.
In the commands below, substitute n8n-node new with npm create @n8n/node@latest. When using this form, you must add a double dash (--) before including any options (like --template). For example:
1 | |
The command will prompt for any missing information about your node and then generate a project structure to get you started. By default, it will follow up by installing the initial project dependencies (you can disable this by passing the --skip-install flag).
Setting node details interactively#
When called without arguments, n8n-node new prompts you for details about your new node interactively:
1 | |
This will start an interactive prompt where you can define the details of your project:
- What is your node called? The name of your node. This impacts the name of your project directory, package name, and the n8n node itself. The name must use one of the following formats:
n8n-nodes-<YOUR_NODE_NAME>@<YOUR_ORG>/n8n-nodes-<YOUR_NODE_NAME>
- What kind of node are you building? The node type you want to build:
- HTTP API: A low-code, declarative node structure that's designed for faster approval for n8n Cloud.
- Other: A programmatic style node with full flexibility.
- What template do you want to use? When using the HTTP API, you can choose the template to start from:
- GitHub Issues API: A demo node that includes multiple operations and credentials. This can help you get familiar with the node structure and conventions.
- Start from scratch: A blank template that will guide you through your custom setup with some further prompts.
When choosing HTTP API > Start from scratch, n8n-node will ask you the following:
- What's the base URL of the API? The root URL for the API you plan to integrate with.
- What type of authentication does your API use? The authentication your node should provide:
- API Key: Send a secret key using headers, query parameters, or the request body.
- Bearer Token: Send a token using the Authorization header (
Authorization: Bearer <token>). - OAuth2: Use an OAuth 2.0 flow to get access tokens on behalf of a user or app.
- Basic Auth: Send the base64-encoded username and password through Authorization headers.
- Custom: Create your own credential logic. This will create an empty credential class that you can customize according to your needs.
- None: No authentication necessary. Don't create a credential class for the node.
Once you've made your selections, n8n-node will create a new project directory for your node in the current directory. By default, it will also install the initial project dependencies (you can disable this by passing the --skip-install flag).
Providing node details on the command line#
You can provide some of your node details on the command line to avoid prompts.
You can include the name you want to use for your node an argument:
1 | |
Node name format
Node names must use one of the following formats:
@<YOUR_ORG>/n8n-nodes-<YOUR_NODE_NAME>n8n-nodes-<YOUR_NODE_NAME>
If you know the template you want to use ahead of time, you can also pass the value using the --template flag:
1 | |
The template must be one of the following:
declarative/github-issues: A demo node that includes multiple operations and credentials. This can help you get familiar with the node structure and conventions.declarative/custom: A blank template that will guide you through your custom setup with some further prompts.programmatic/example: A programmatic style node with full flexibility.
Building your node#
You can build your node by running the build command in your project's root directory:
1 | |
n8n-node will compile your TypeScript files and bundle your other project assets. You can also call the build script from your package manager. For instance, if you're using npm, this works the same:
1 | |
Lint your node#
The n8n-node tool automatically creates a lint script for your project as well. You can run with your package manager. For example:
1 | |
You can also run through your package manager's script runner:
1 | |
If you include the --fix option (also callable with npm run lint:fix), n8n-node will attempt to fix the issues that it identifies:
1 | |
Testing your node in n8n#
To test your node in n8n, you run the dev command in your project's root directory:
1 | |
As with the build command, you can also run this through your package manager. For example:
1 | |
n8n-node will compile your project and then start up a local n8n instance through npm with your node loaded.
Visit your localhost:5678 to sign in to your n8n instance. If you open a workflow, your node appears in the nodes panel:
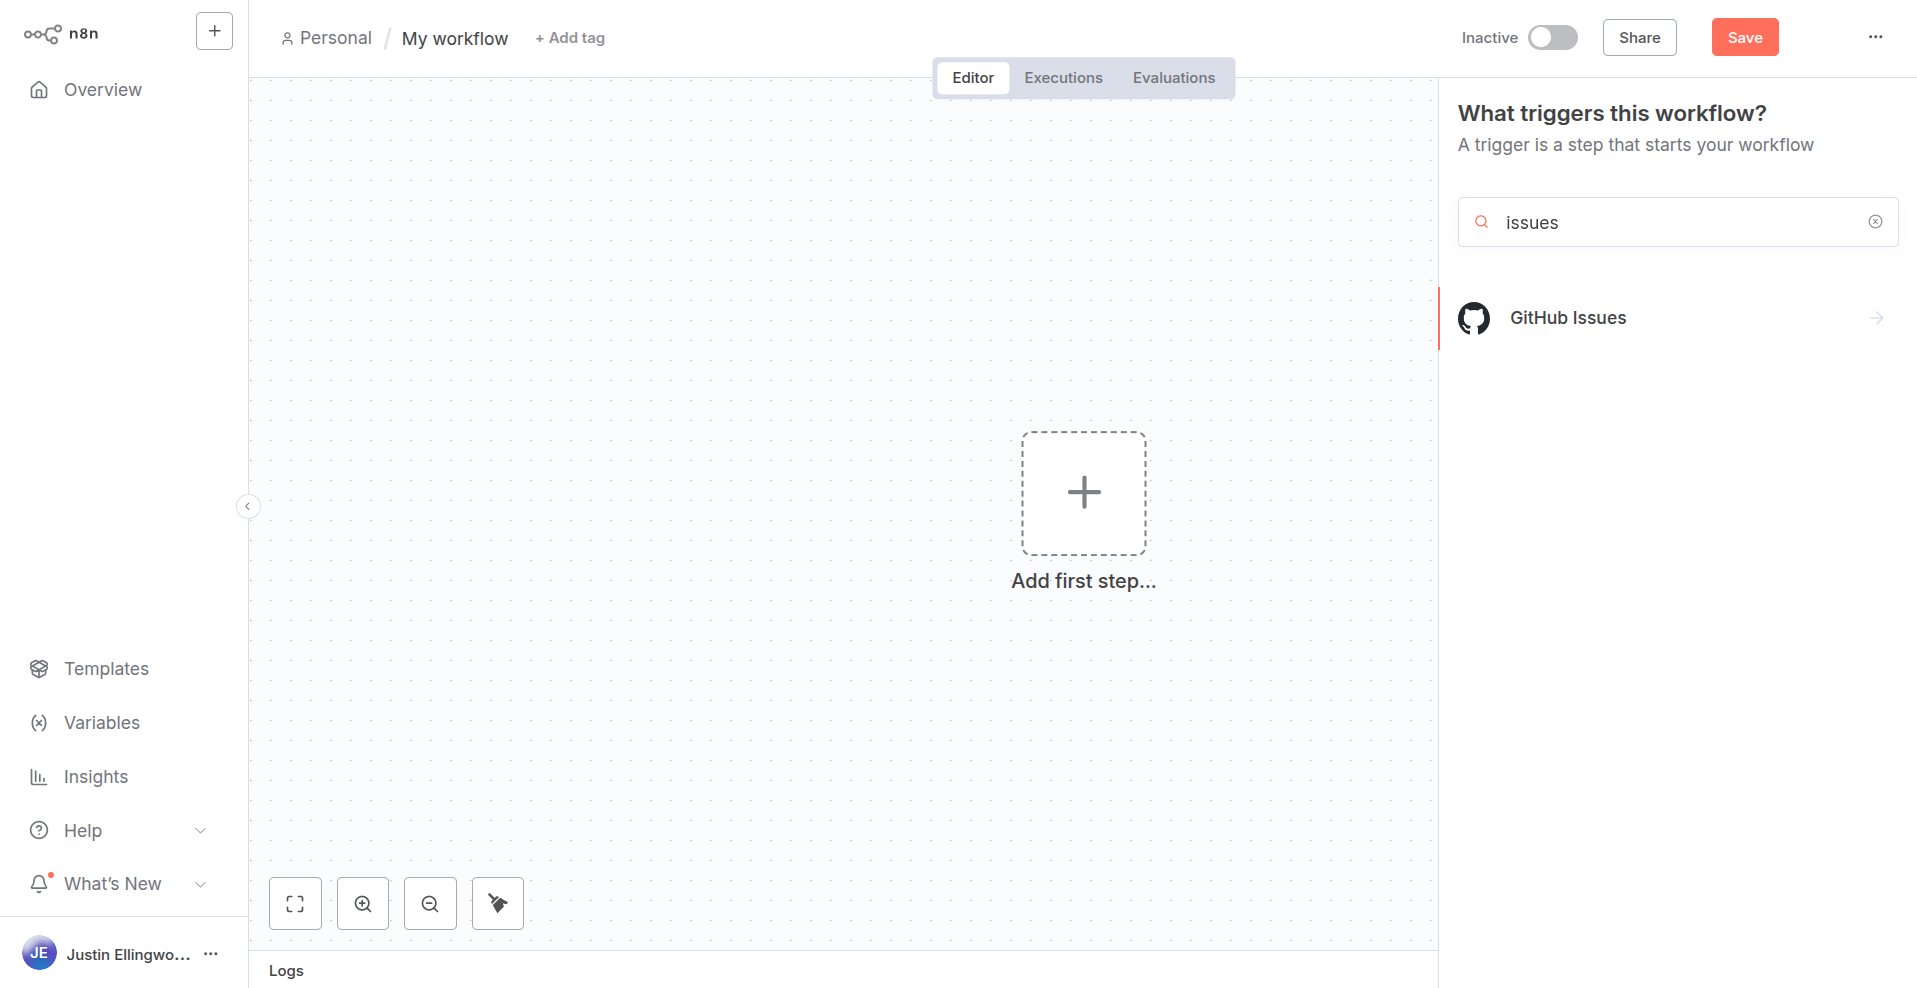
From there, you can add it to your workflow and test the node's functionality as you develop.
Release your node#
To publish your node, run the release command in your project directory. This command uses release-it to build and publish your node.
Log in to npm
To use the release command, you must log in to npm using npm login command. Without this, n8n-node won't have authorization to publish your project files.
1 | |
To run with npm, type:
1 | |
When you run the release command, n8n-node will perform the following actions:
- build the node
- run lint checks against your files
- update the changelog
- create git tags
- create a GitHub release
- publish the package to npm