2. Inserting data into Airtable#
In this step of the workflow, you will learn how to insert the data received from the HTTP Request node into Airtable using the Airtable node.
Spreadsheet nodes
You can replace the Airtable node with another spreadsheet app/service. For example, n8n also has a node for Google Sheets.
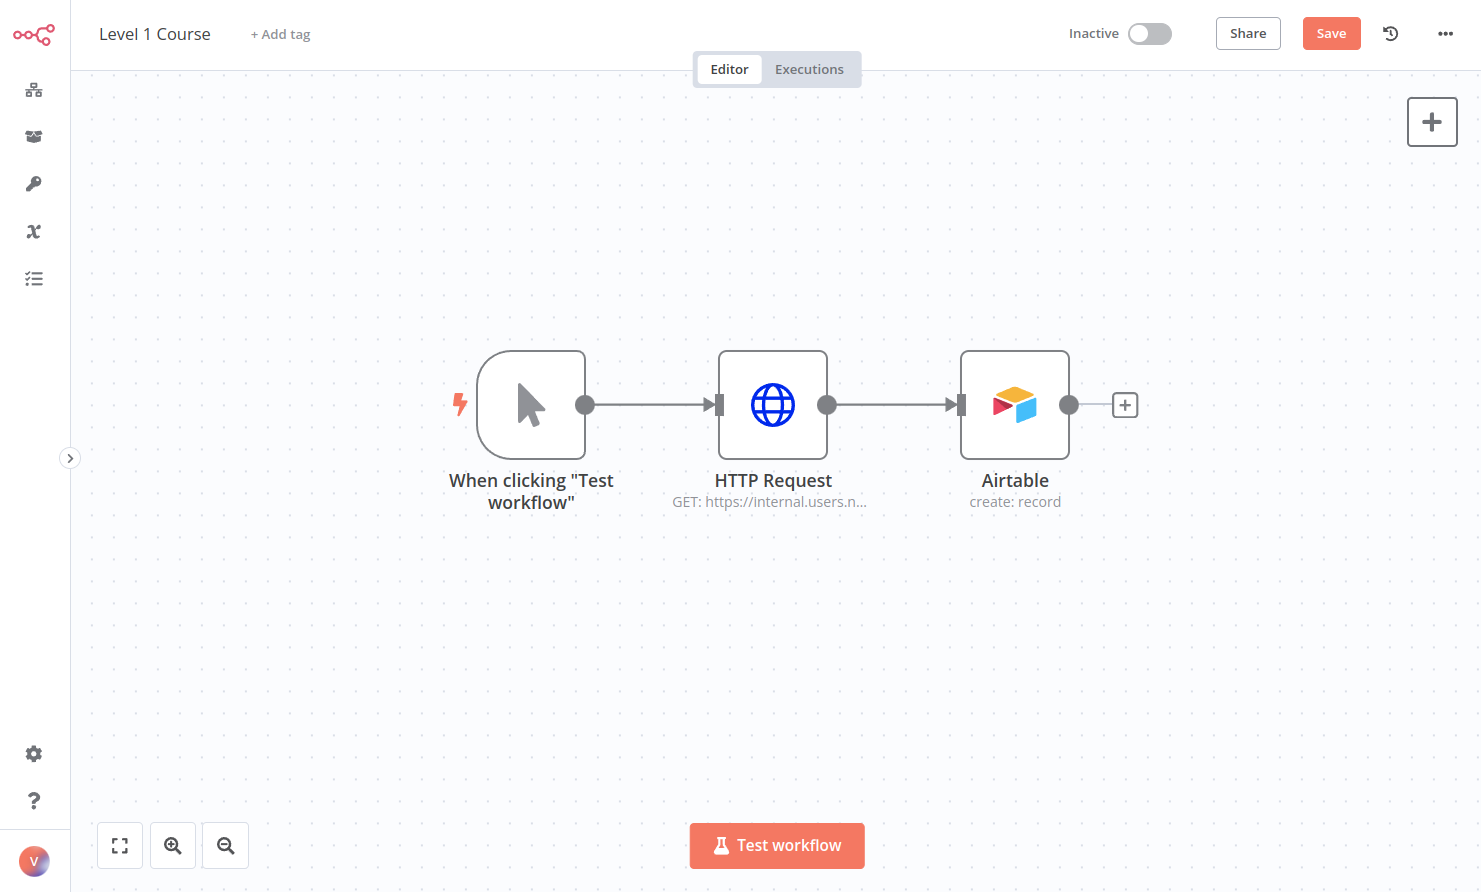
After this step, your workflow should look like this:
Configure your table#
If we're going to insert data into Airtable, we first need to set up a table there. To do this:
- Create an Airtable account.
-
In your Airtable workspace add a new base from scratch and name it, for example, beginner course.

Create an Airtable base -
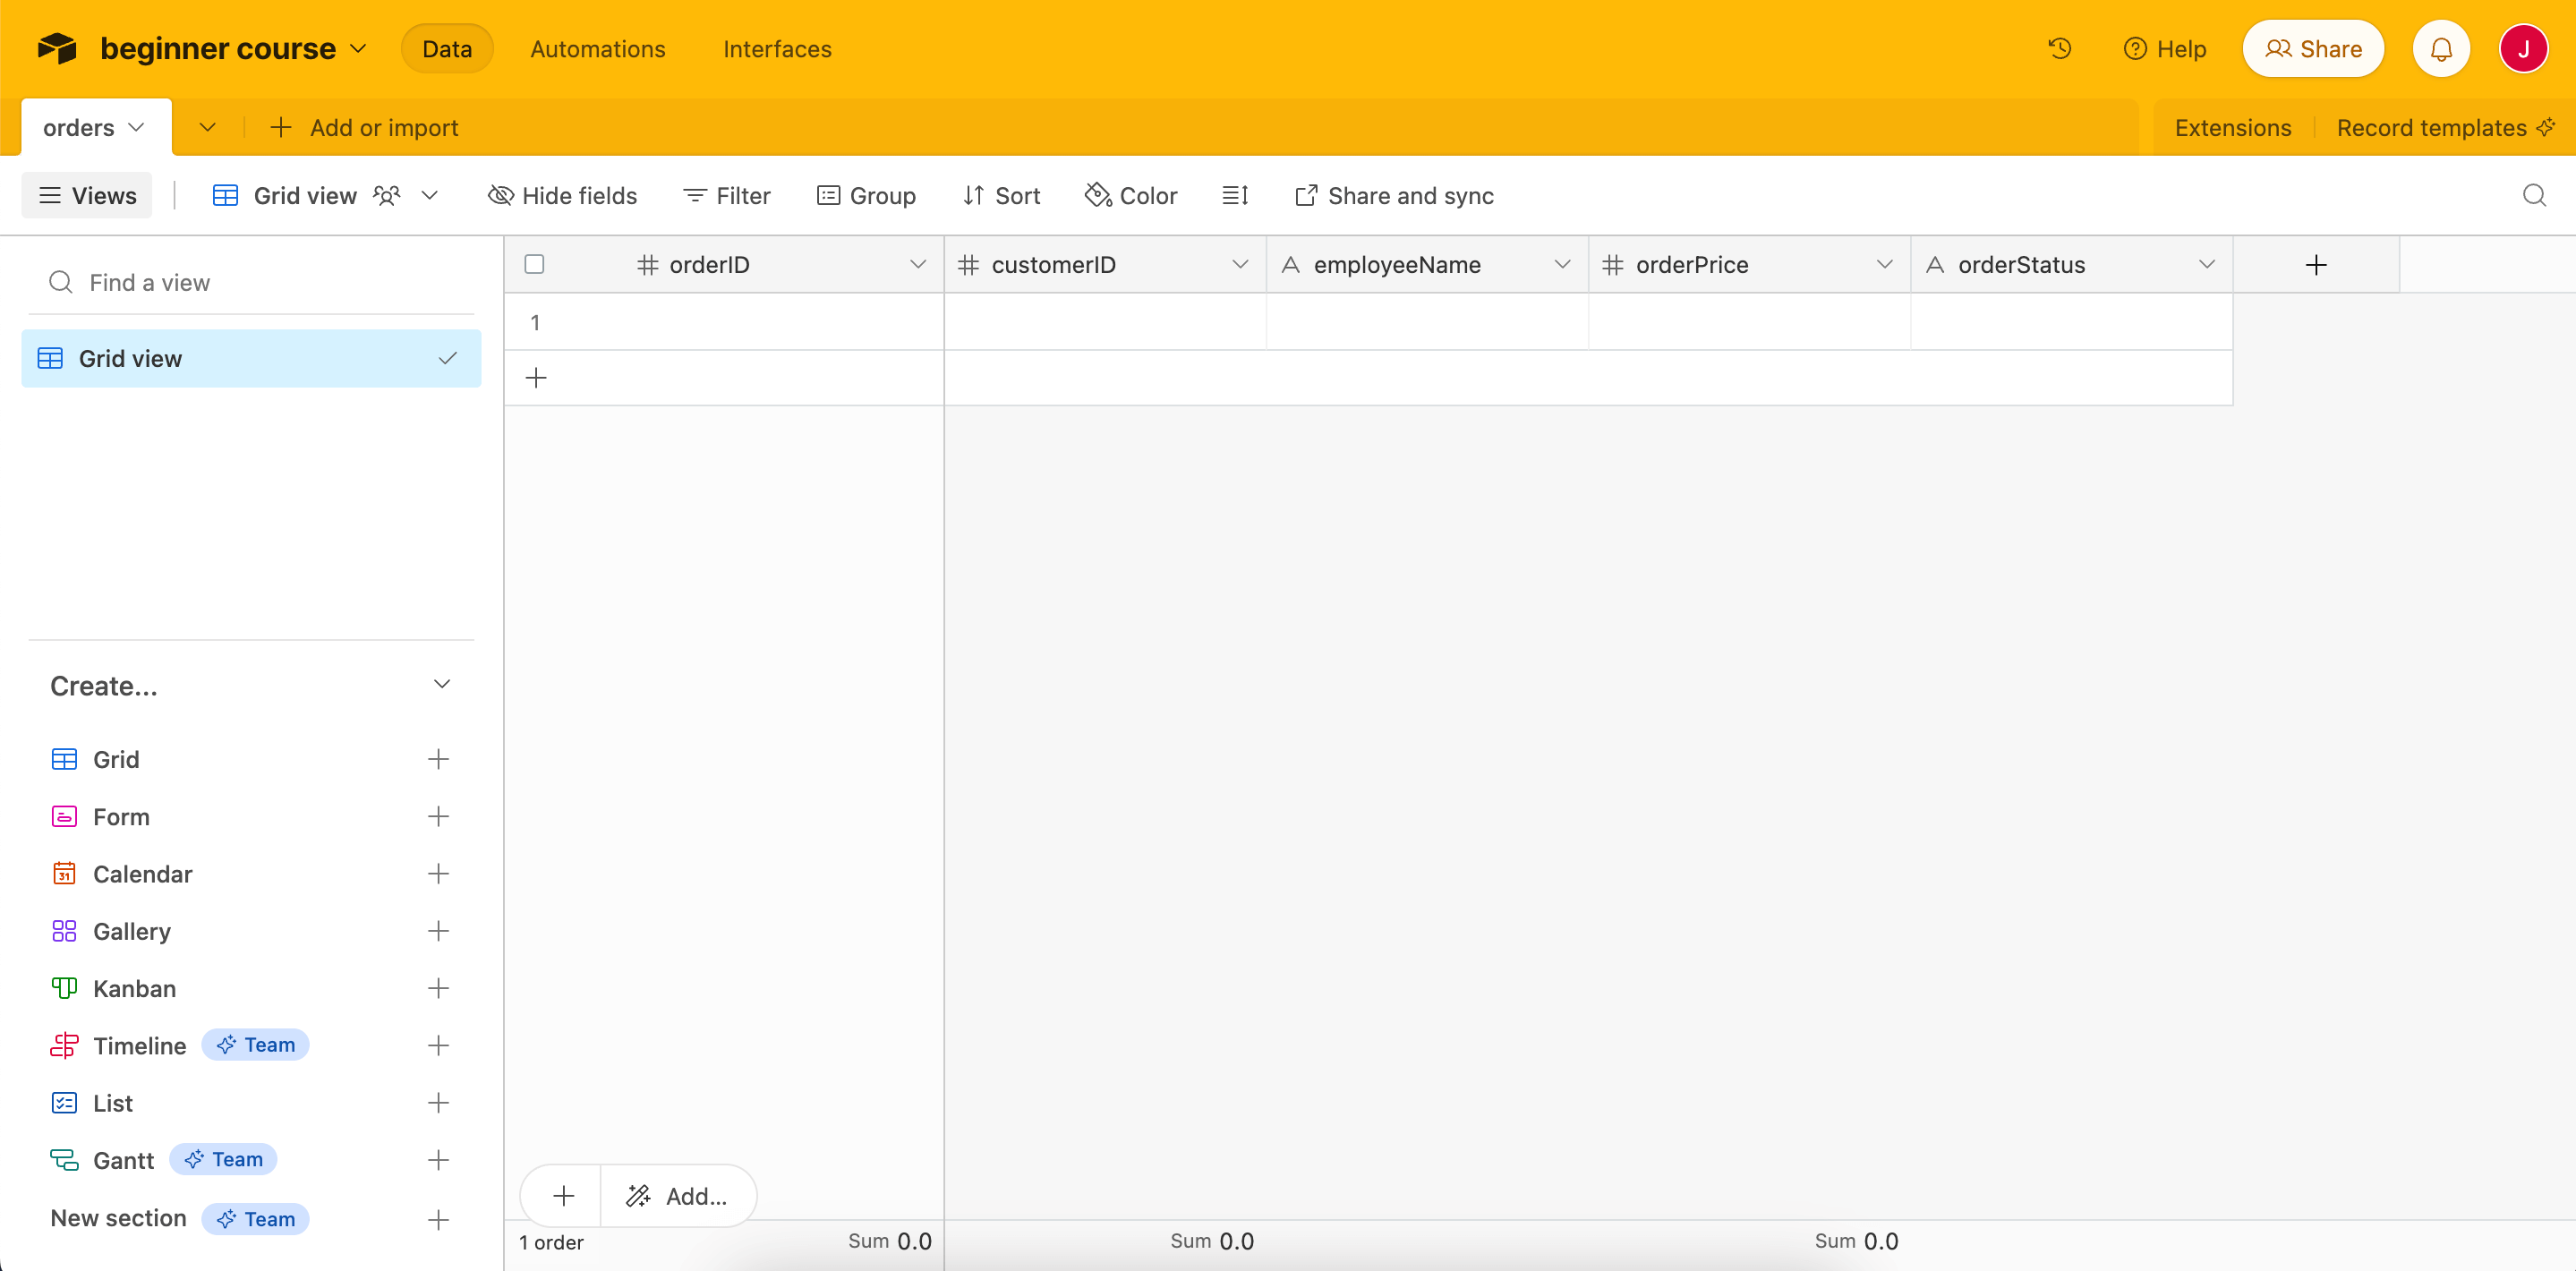
In the beginner course base you have by default a Table 1 with four fields:
Name,Notes,Assignee, andStatus. These fields aren't relevant for us since they aren't in our orders data set. This brings us to the next point: the names of the fields in Airtable have to match the names of the columns in the node result. - Replace the four default table fields with the five column names from the data set, selecting Number field type for
orderID,customerID, andorderPrice, and Single line text foremployeeNameandorderStatus. - Delete the 3 blank rows created by default.
- Also, rename the table from Table 1 to orders to make it easier to identify.
Now your table should look like this:
Now that the table is ready, let's return to the workflow in the n8n Editor UI.
Add an Airtable node to the HTTP Request node#
Add an Airtable node connected to the HTTP Request node.
Remember
You can add a ndoe connected to an existing node by selecting the + icon next to the existing node.
In the node panel:
- Search for Airtable.
- Select Create a record from the Record Actions search results.
This will add the Airtable node to your canvas and open the node details window.
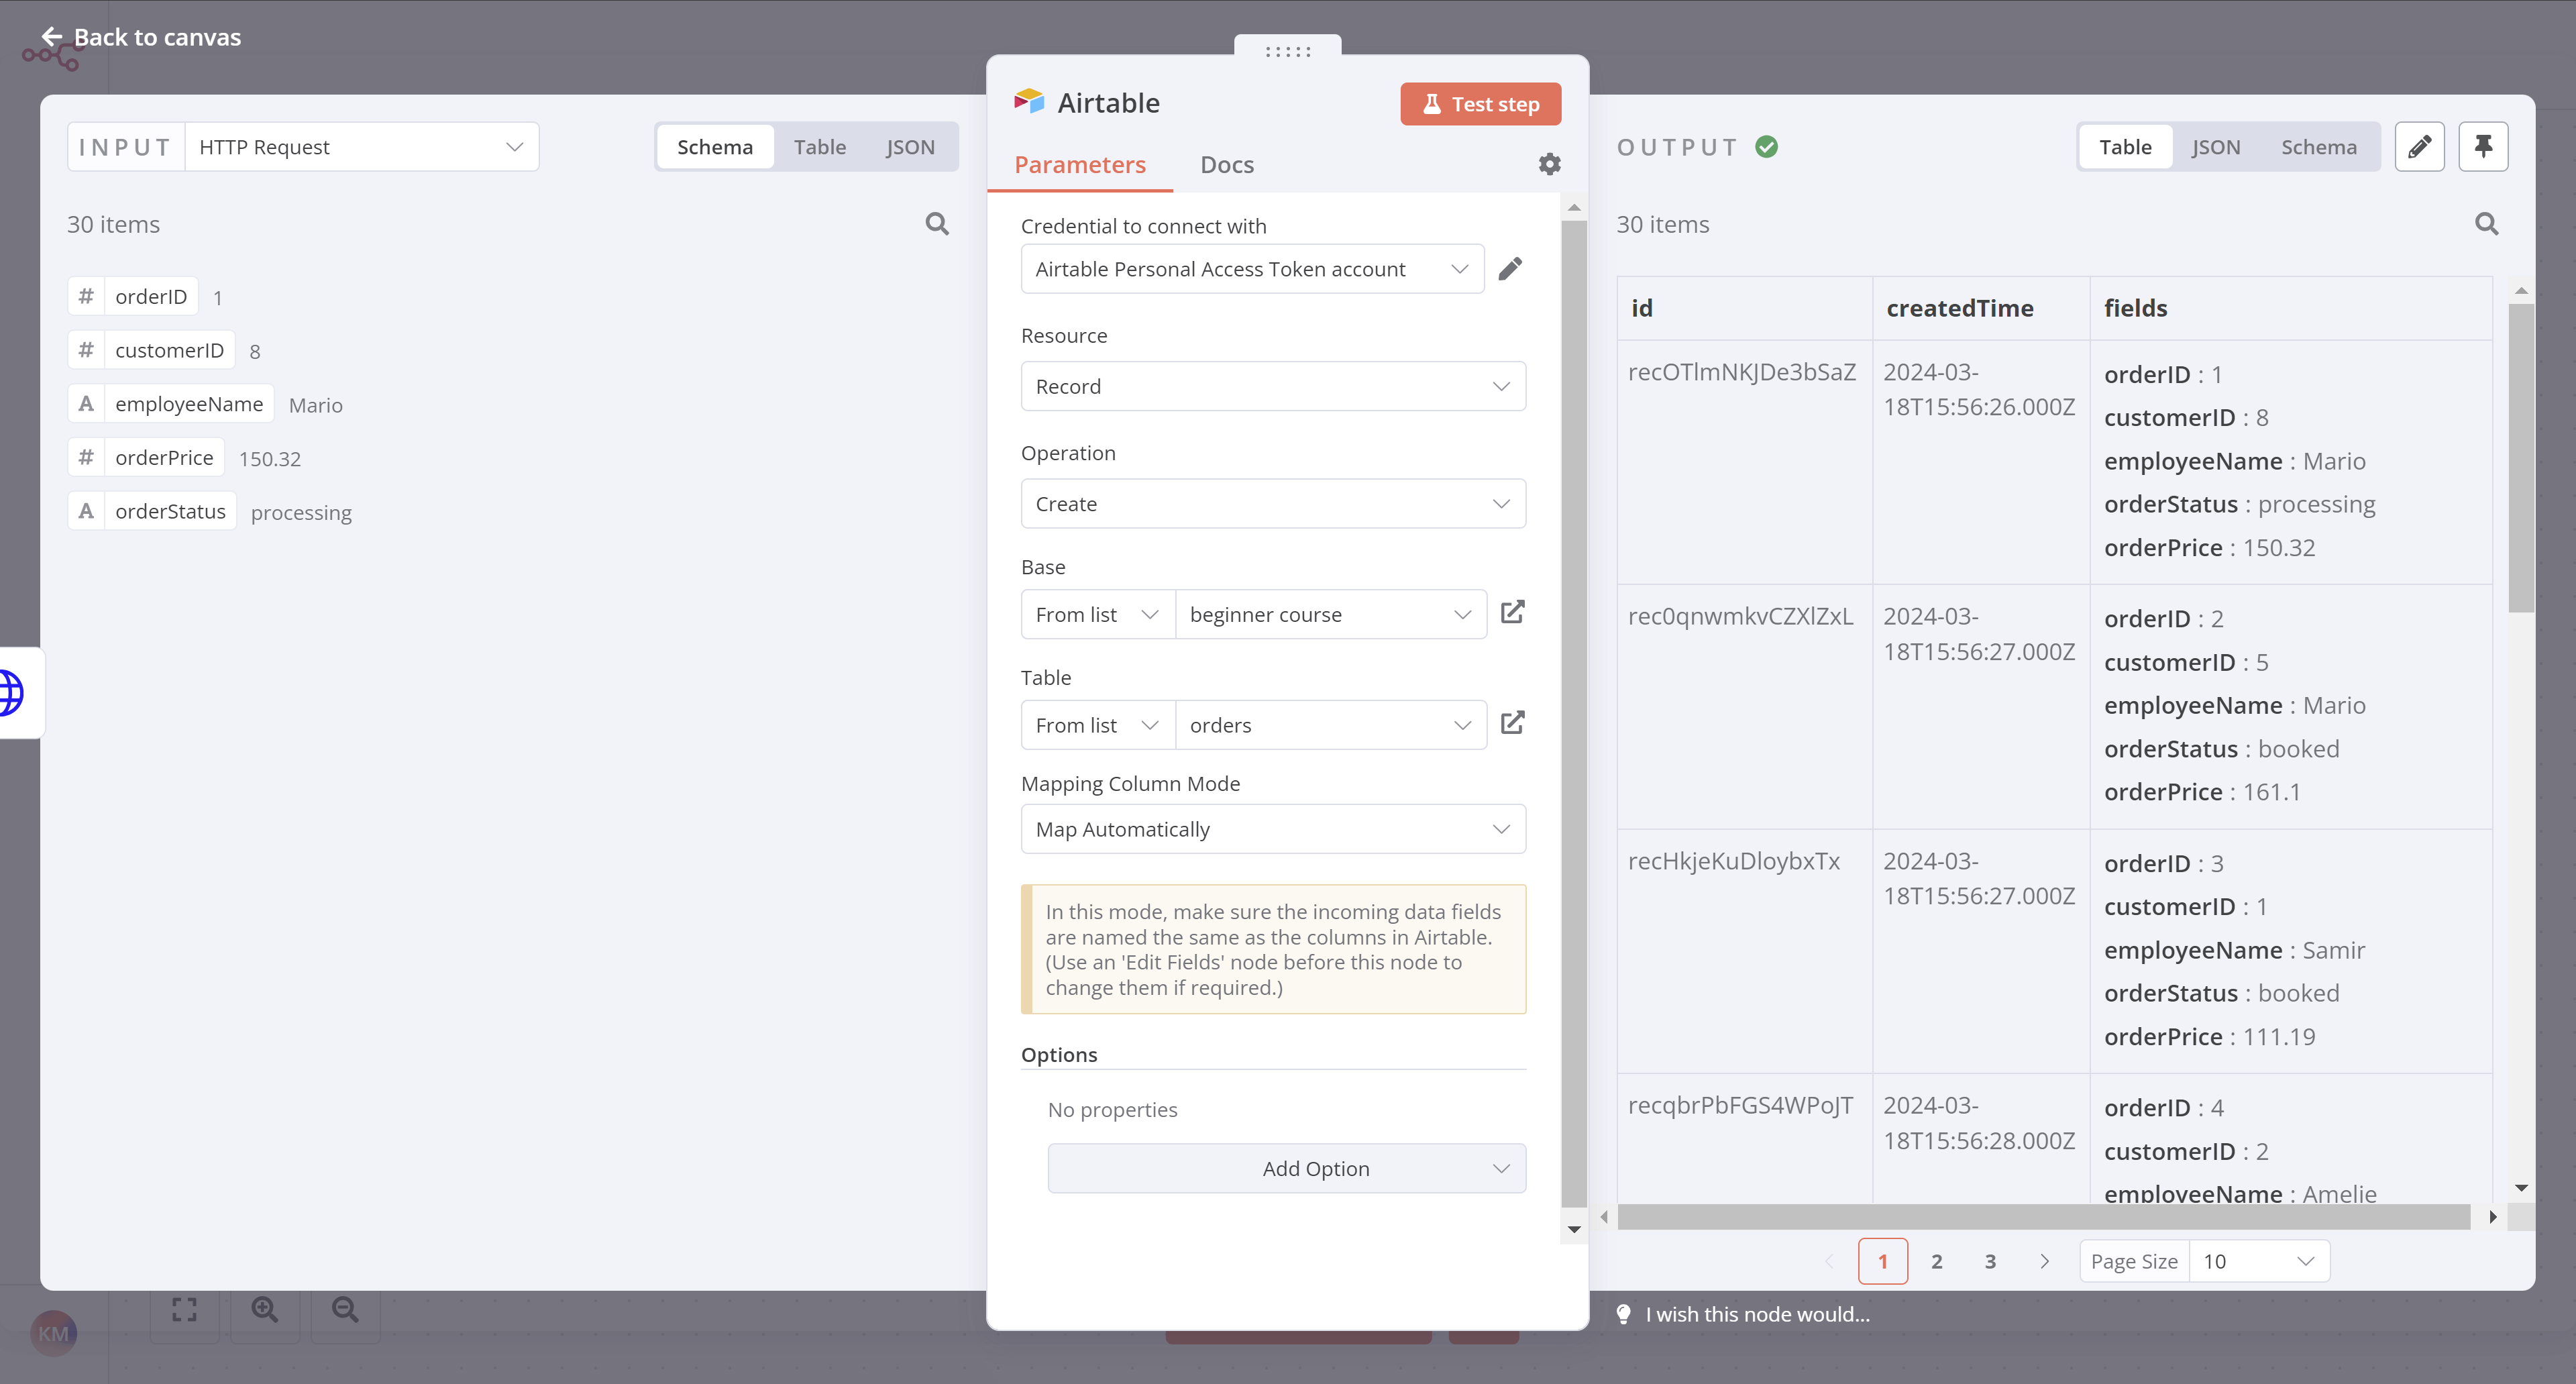
In the Airtable node window, configure the following parameters:
- Credential to connect with:
- Select 'Create new credential'
- Keep the default option 'Connect using: Access Token' selected
- Access token: Follow the instructions here to create your token. Adding credentials for Airtable is similar to the HTTP Request node you configured in the previous chapter. However, the process of obtaining an API key for Airtable (and other apps/services) is different.
- Resource: Record
- Operation: Create. This operation will create the new record in the table.
- Base: You can pick your base from a list(e.g beginner course), URL or ID after authenticating. If you wish to use the Base ID, go to Airtable's API page and find the relevant base (located at the bottom of the page). Then click the base title and you'll find the ID on that page.
- Table: orders
- Mapping Column Mode: Map automatically. In this mode, the incoming data fields are named the same as the columns in Airtable
Test the Airtable node#
Once you've finished configuring the Airtable node, execute it by selecting Test step.
Your results should look like this:
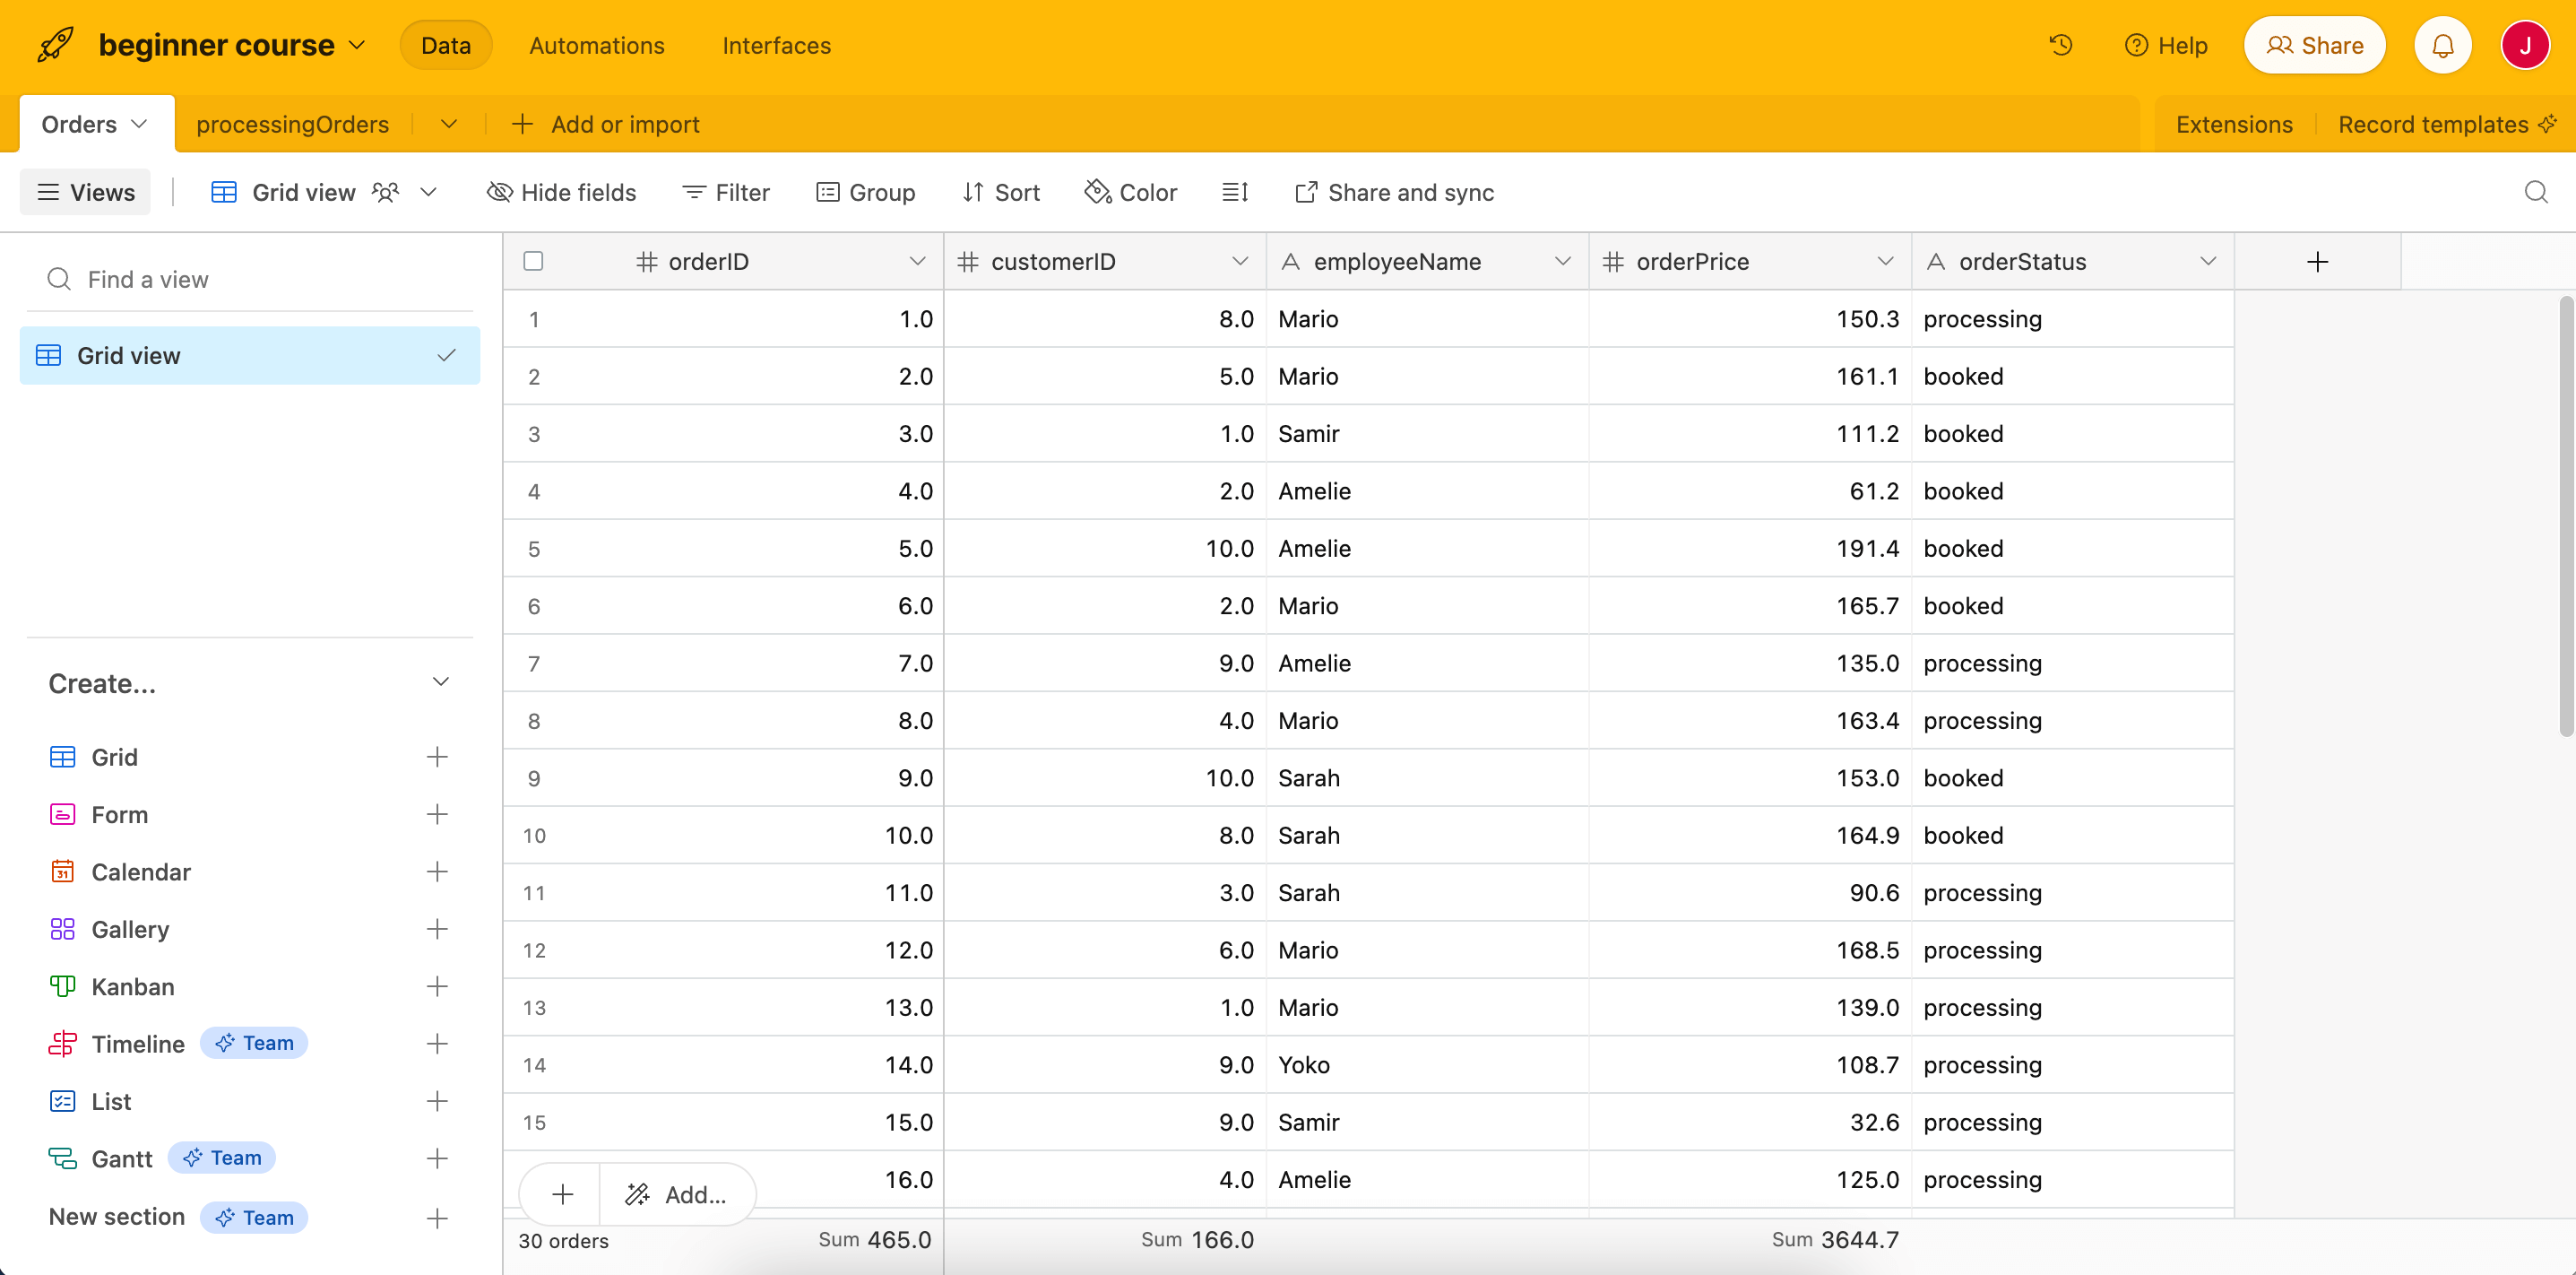
All 30 data records will now appear in the orders table in Airtable:
What's next?#
Nathan 🙋: Wow, this automation is really useful! But this inserts all collected data from the HTTP Request node into Airtable. Remember that I actually need to insert only processing orders in the table and calculate the price of booked orders?
You 👩🔧: Sure, no problem. As a next step, I'll use a new node to filter the orders based on their status.